A Bike for Dad

Tags

, , , , ,


BH-1.jpg

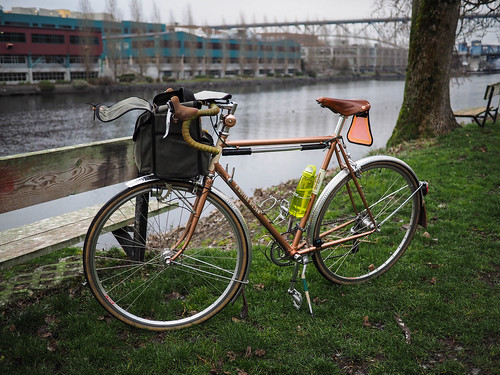
My folks are visiting Washington this summer to escape the heat of Arizona.  My mom had a bike with her (an older Japanese Soma from the 80s), but my dad was out of luck.  I happened to have a pretty good solution in the Miyata that I had relegated to “lunch ride” bike.  The cockpit wasn’t going to work, however.  Way too hunched over for a 72-year-old.  The genius of Rivendell’s Bosco bars came to the rescue.  I showed him an Albatross setup, as well, but he wanted the higher bars.  After an interesting start launching off the driveway wall, he was underway.  I lowered the seat a bit, but otherwise the bike fit him just right.  Look at that upright position he’s able to get on a laid out ’88 downhill MTB large frame!  Not bad!

BH-4.jpg

I’ll miss this one this summer, but will make due with the alternates.  I’m glad this bike is still finding a home with someone who will be able to enjoy it.  It deserves to be ridden for a few more decades.  Lugged steel!

BH-2.jpg

Tale of two rando bikes

Tags

, , , , , , , , ,


After my brief flirtation with a bigger tire on my Hilsen, I’m back to the real original version.  Jack Brown 33.3s.  They actually measure just under 34mm, so only 3 or 4 mm smaller than the Barlows.  Who knew!  They feel great, and I don’t have as much toe overlap with this setup.

BH-1.jpg

I noticed how much this bike is like the “new” rando I’ve been taking on the longer rides this year.  Slightly different geometry on the frames, different tire size, but really close to the same measurements at the body contact points.  Here are two side by sides:

A. Homer Hilsen

BH-5.jpg

Velo Routier

BH-8.jpg

I’m using the same seat, bars, and cranks.  Pedals will soon be the same if I can make up my mind on the clipless of choice.  There is one main difference I could feel today on my ride home.  The bars on the Hilsen are 2cm above seat height.  On the Routier, they are only  1cm above the seat.  This was changed as soon as i got home as I’ve been plenty comfortable on the Routier this season, and the Hilsen actually felt a bit odd – like I was riding a “comfort” setting.  It was not feeling quite the same in the power output.  With the bars dropped, and a test ride to confirm, I now have a spare rando bike (it was actually the original brevet bike and did just fine for the past two seasons).

BH-4.jpg

Now I just need to get the time to actually devote a day to a ride!


Barlow Pass

Tags

, , , , , , , , , , , , ,


BH-4.jpg

After putting 38mm tires (Compass Barlow Pass) and new fenders (VO Zeppelins) on my Hilsen, and riding them for a month or so, I have the following observations.

  1. They are cushy and ride well
  2. They are light (I have the Extra Lights) and don’t slow my pace down
  3. They increase stand over height by a half cm or so (it is noticeable)
  4.  The bike handles about the same
  5. The tread is very grippy – I like the sure-footedness
  6. There is now quite a bit of toe overlap, and I have bounced the fender several times during slow maneuvers
  7. The difference between my 31mm Cypress and these 38mm Barlows is much less evident than jumping to a 42mm Hetre

I am slowly coming to the realization that I like smaller, fatter wheels on road bikes, but if I’m on a 700c, 33.3mm is the most I need.  On both the Hunqapillar and my Hilsen the favorite tires for pure road riding have been either Gran Bois Cypres or Rivendell Jack Brown (Greens).  Both combos make the bikes feel fast, agile, and just “right”.  They also do a good enough job to absorb road bumps that I don’t feel beat up even after a long (200k/300k) ride.  When I have a bigger tire (35mm+) on a 700c wheel, the bike feels a bit ponderous.

Green in Front

I really want to like the Barlows – but they are just not Hetres, and they aren’t feeling significantly better or more comfortable than the Cypres/JBs.  I don’t know if the added volume makes the toe overlap worth the bother. I also like the hammered Honjo fenders I had on this bike.  They added a touch of class…

BH-1.jpg

Slickrock

Tags

, , , , , , , , , , , ,


BH-5.jpg

I’ve been a bit absent from posting lately.  I just got back from a family spring break vacation, and it was actually somewhat bike related.  Back in ’94, I took my first road trip to Southern Utah canyon country and fell in love.  I had my ’92 Stumpjumper Pro with at the time, and my brother in law and I rode the famous Slickrock Trail in Moab.  It was a memorable experience, and caused a few repeat visits over the next few years.  My last time there was in ’97 when a friend and I rented a jeep and some bikes and did a portion of the trail in addition to jeeping around the White Rim trail in Canyonlands.

BH-3.jpg

“Slickrock” is sandstone laid down during the Jurassic period (200 million years ago).  This area of Utah was once a giant inland sea, as well as a desert the size of the modern Sahara.  Over time the dunes and seafloor were compressed into the sandstone, and then erosion took over to sculpt the landscape into a serious wonder.  The Slickrock trail is like a stroll across frozen sand dunes.  Well – more like a struggle to get through them over and over again.  The really cool thing about mountain biking on these is the amazing traction and grades that you can climb.  The traction is like sandpaper pavement.  When I was there in the ’90s, some folks were using nearly slick tires – kind of early cross tires.  The knobbies only help in the fairly infrequent sandy drainage areas eroded at the bottoms of some of the rock dunes, and are as worthless on the slick rock as they are on pavement.
BH-2.jpg

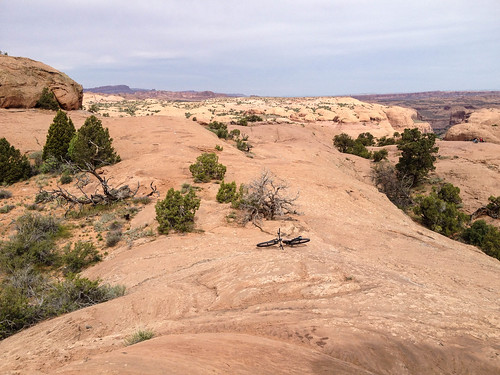
If you look at this picture, you can see the white painted trail on the rock.  This is the only way you will find your way back to the parking lot before you pass out from lack of water!  Seriously, it’s not too bad in the spring and fall.  The temps were in the 70s (F) while we were there.  You still need to pack water – a 64-128 oz size camelback would be the best option if you choose to do the entire trail depending on the time of year.  I would also suggest bringing some energy food with – you will need it.  This trail is listed as advanced/strenuous.

BH-1.jpg

I only had time to do the practice loop (2 miles) this time, but I’m not in my 20’s anymore either.  I can tell you that randonneuring doesn’t prepare one for slick rock.  The riding here is like repetitive short burst climbs followed by short steep descents.  It is really vertically focused.  The whole trail is only 10.7 miles long, but it encompasses about 1000 feet of climbing.  I’ve always seen plenty of varied fitness levels in the folks riding, however, and you can surely walk the trail if needed, so don’t be discouraged if you’re not in top shape.

BH-4.jpg

Bike notes from the trip:  I rented full suspension 29’ers from Chile Pepper Bike Shop on the main drag in town.  My rental experience was good as far as the shop goes.  My personal preference for riding this trail would be to do it on a light hardtail.  I had a bit more trouble climbing with the big, heavier full suspension rig, and I’m not sure the 29″ wheels helped me on that account either.  I couldn’t really lock out the shocks for the climbs as they happen constantly, so I left it in the XC setting.  The bike was a Giant Trance 29er.

BH-2.jpg

My wife and daughter also got the same bike (daughter had size XS and we had Medium).  For our more mellow rides, we chose to go on the Intrepid trail system in Dead Horse Point State Park.  This is a really nice beginner/intermediate series of 3 loops of growing lengths that rides along the canyon rim.

BH-9.jpg

We all had a great time, and it was cool introducing my daughter to the area that inspired so much adventure for me.  I hope we planted a seed that manifests in her own adventures in the future!

Here are some links to the Slickrock and Dead Horse Intrepid trail systems:

http://www.utahmountainbiking.com/trails/slickrck.htm

http://www.utahmountainbiking.com/trails/dead-horse-pt.htm


The Weapon of Weep

Tags

, , , , , , , , , , , ,


I plan to become a stronger rider.  That much is for sure.  One way to do it is stop eating big fat lunches with the workmates, and go out on my bus/carpool/motorcycle days to ride intervals.  I don’t really have a great bike for that, however.  Wait…  Maybe I do?  The old Miyata RidgeRunner Team that was my Bosco’d lazy bike might fit?  I’ve always sort of loved this mutt – it has a great fast, low feel to it.  Awesome Compass tires that feel like 26″ Hetres!

But, there is that high bottom bracket which was made to fly over fallen logs and various obstacles on the ’88 downhill circuit.  That’s the achilles heel for this bike, I fear.  Then there is the obnoxious U-Brake.  Hmmm – I guess this may still work for a 1-hour lunch ride slash torture session.  Better than sitting barless and sad in the basement bike heap.  OK – first things first.  Put on an old dirt drop cockpit setup I have laying around.  I hope the reach isn’t too short.

BH-10.jpg

Nice!  Even has the diamond tape!  Not really a match, but I’ll add a little blue to the drops.  There.  Much better…  Now about shifters.  Hmmm – I could do the stem setup like I had on the clown bike?

B&M Lumos B

Nope.  Too much hand movement – can’t deal with that while I’m cranking up a hill at top speed, right?  How about something more ergo – perhaps thumbie style?

BH-16.jpg

Awww yeah – that’s more like it…  Now is this a scramblin’ interval machine or what?

BH-8.jpg

This sucker looks fast just standing there.  Like it’s going to jump the start and kill the field.  Those lugs!  Those fenders!  That raked cockpit!  Damnnnnn.  Better put some clipless pedals on this beast.  Need maximum torque.  Let’s put a Ti Brooks Pro on there, too.  Keep the weight and comfort down – no sense getting complacent and sitting down on the ride…

BH-3.jpg

Hmmm – that old V-Brake’s gotta go.  No problem solver rig this time.  This bike was built in the golden era of cantis.  Hey – I just got a pair of CX70s for the rando bike that I didn’t need (had centerpulls).  How about we try one out on the front?  Crap – gotta put a cable hanger on there somewhere…  Hmmm… I know I have one lying around somewhere.  There we go.  Got it.  OK – now comes the fun part!  Get it to work.  It’s raining tomorrow – perfect day for a transport stage.  There’s life in this old steed yet!

BH-5.jpg