• About Me

Cycle Seattle

~ Posts on bikes

Cycle Seattle

Tag Archives: Shimano

For Sale: Bikey Stuff

04 Sunday Jun 2017

Posted by Stonehog in Cycling, For Sale, Northwest

≈ 2 Comments

Tags

bike, For Sale, nitto, pedals, Shimano, Sidi, speedplay


I’m selling off some things I will no longer be needing.

  • Nitto Chocomoose bars in harlequin wrap with DiaCompe levers: $130
  • Nitto Alu Albatross bars in harlequin wrap (burgundy/grey) with 13cm stem and Tektro Eclipse (canti or v) levers: $140
  • Sidi Spider MTB shoes EU 40.5: $100
  • Sidi Diablo GTX shoes EU 40: $90
  • Time ATAC and MKS Urban ATAC pedals: $30 for both SOLD
  • Swift Paloma Bar Bag: $125
  • Shimano PD-A530 2 pair: $50
  • Speedplay Frog CroMoly: $50

Pics are here: https://flic.kr/s/aHskWtupQH

Image

Front Derailleur Destructor

03 Sunday Jan 2016

Tags

a. homer hilsen, campagnolo, centaur CT, CX-70, derailleur, rivendell, Shimano


Blast from the past post…

I’ve had two derailleurs on my Hilsen self destruct.  The first on a 300k keeping me in the big ring for the 2nd half of the ride.  The second on a commute home.  Different manufacturers, same bike and crank/chainrings.  Strangely, they both broke in August – exactly one year apart.  The other strange thing here, I have the exact same crankset on my Vélo Routier, and have never had an issue.  It uses an older derailleur – Suntour XC Pro, however.

I’ve gotten advice from “ignore it – probably just unlucky” to “need a stronger derailleur”.  Something is going on here.  I have always been careful to align the derailleur within 2-4mm of the outer chainring.  Perhaps this bike just needs a 1×10?  I’ve never had another bike destroy even one front derailleur, so I was suspicious of the following:

  1. Chainring 16 tooth spacing (44t – 28t) too great a jump
  2. Chainring thickness (chain seemed to stick to big chainring)
  3. Derailleur construction

On to the specifics:

The first one let go on a 300k brevet on August 4th, 2013.  It was a Shimano CX-70.  Luckily it happened after my big climb for the trip up to Artist’s Point on Mt. Baker.

BH-1.jpg

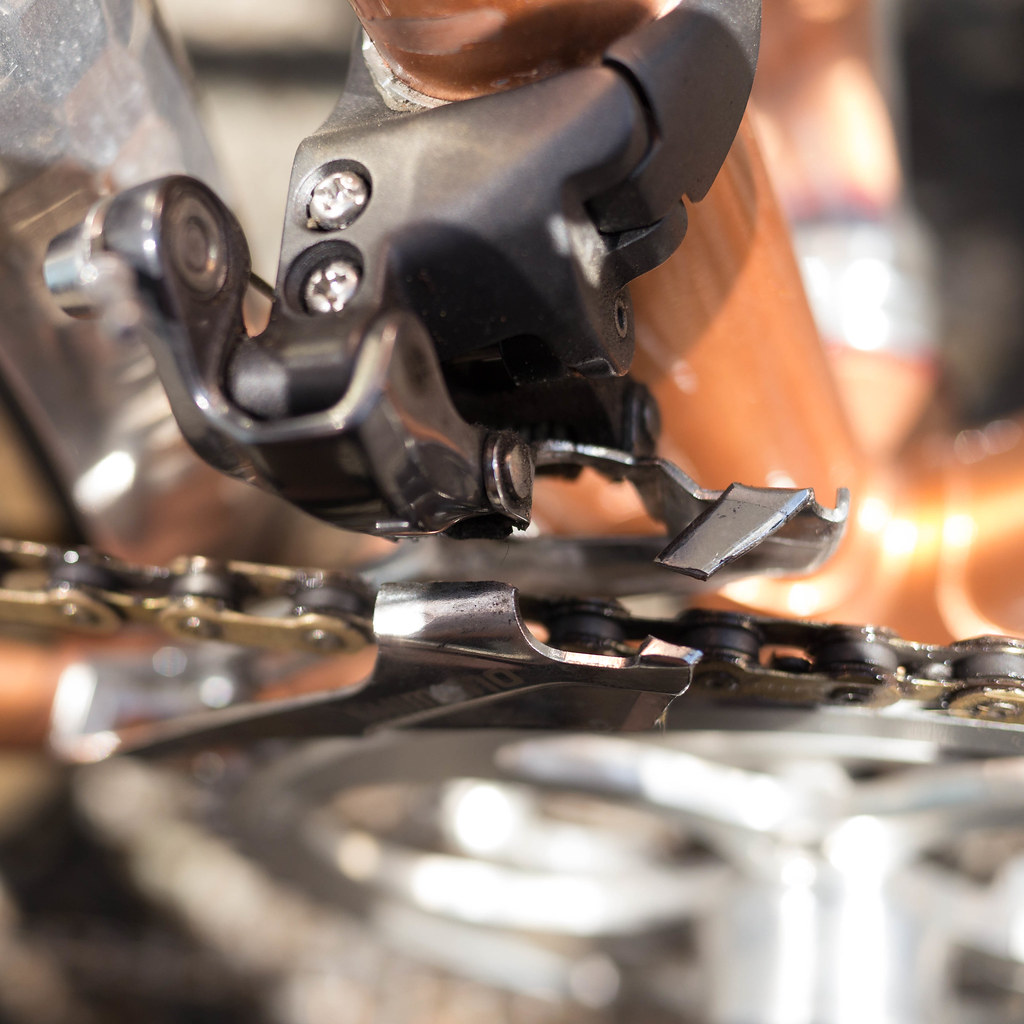
Popped on the outside

As you can see, the outer cage popped out at the top with a fairly clean break.  To be fair, I had several instances of chainsuck over the prior year that spread the derailleur apart.  To fix, I would just push the cage back into the normal shape after I re-railed the chain.  I assume it finally fatigued to the point of failure after the last chainsuck.

I then mounted a Campagnolo Centaur CT that had worked well on other bikes.  This lasted for approximately 1 year, but then self destructed in much the same way on August 12, 2014, breaking on the upper inside plate.

BH-1.jpg

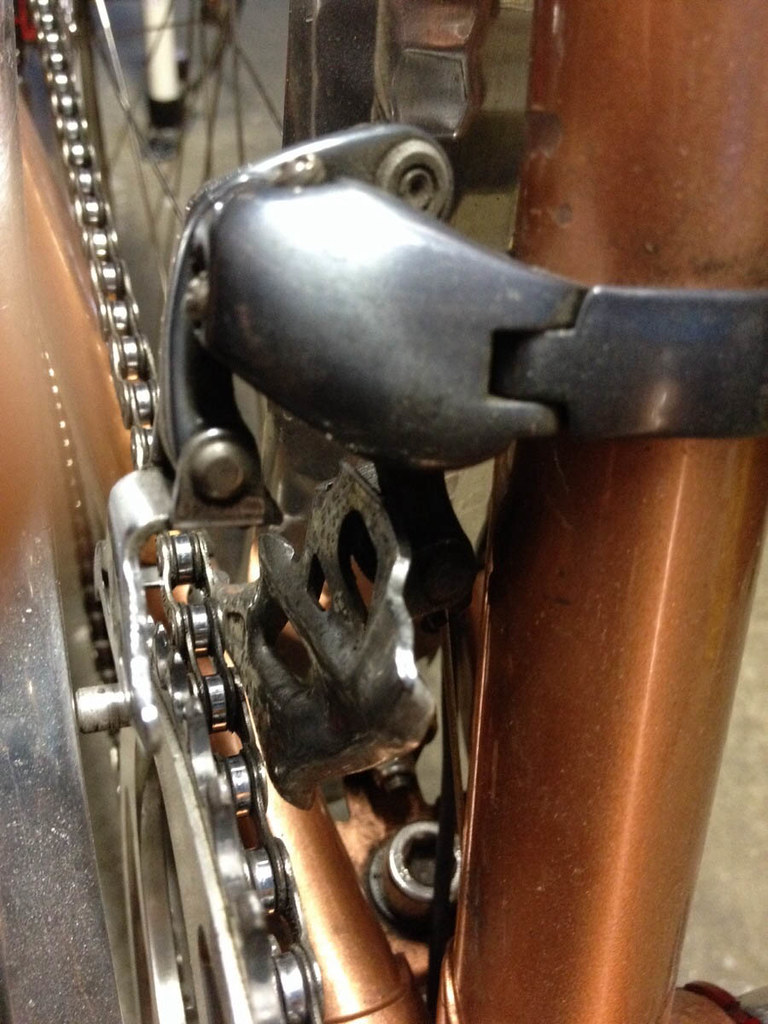
Popped on the inside

At this point, it was clear that the shifting pressure was too much for these modern derailleurs.  I decided to swap the big ring from a 44t to a smaller 42t so the gap was not as great.  With an inner ring of 28t, I dropped the spread from 16t to 14t with the hope that it would not be as much distance to push, however, the problem always happened when dropping the chain from the large ring to the small.  I had an extra CX-70 that I put on this bike.  It came from the Hunqapillar, which had never mis-shifted or chain-sucked while it was mounted.

A year and a half later, and all is well.  No sign of problems with the new CX-70, and no further instances of chain-suck.  I have a feeling it was the large chainring causing the problems.  C’est la vie.  One of the more frustrating things about biking (and food/diet) is the sparse amount of useful information out there.  Anyone else had front derailleurs go boom on a road bike?

Ah, the simple days of not having to worry about shifts.  Tech will get us there again, soon.  Can’t wait for the variable ratio belt drive bike that you can control with your embedded chip.


Posted by Stonehog | Filed under Cycling, Randonneuring

≈ 2 Comments

Bike Work

12 Sunday Jan 2014

Posted by Stonehog in Cycling

≈ Leave a comment

Tags

a. homer hilsen, bosco, Grand Randonneur, Miyata, porteur, rivendell, Shimano, Soma GR


I needed some “dad alone time” tonight, so I did a little work on the Miyata RidgeRunner Team.  I like the Rivendell Bosco bars, and have used them for over a year, but it was time for a change.  They are huge, and allow an amazing amount of variety, but they started to feel a bit clownish – perhaps it’s the tape job…

Ready to go

I put a VO Porteur setup back on this bike.  This was a cockpit I had originally on the Hunqapillar, and liked it quite a bit.  I also started out with porteurs on my Hilsen after a bad experience with some of the larger (46cm) Noodles.  I rode that configuration for quite a while until I got a bit of hand numbness on a 100k in 2012.

January Populaire-1

The porteurs are narrow, and have enough reach back towards me that they offer a bit more upright position than drops.  They also look cool 🙂

In doing this, I had to replace all the cables due to the length differences.  I also went to bar end shifters (indexed Shimano 8-speed).  They work fine on the 7-speed cassette, BTW.  The bike feels smaller and narrower now.  I don’t have the bolt upright feel that I had with the Boscos, but I’m saving them for someday when I need to relax a bit.  With more randonneuring coming this year, I need to get used to the more aero position of the drops, and the porteurs aren’t too off.

I’ve thought about selling the Miyata with the forthcoming Soma GR I am planning to build up, but I’m not sure I can do it.  I like the bike a lot, and have put a lot of time and effort into reviving it from the ’80’s MTB form I found it in.  I will post some pics of the new config in the next week, but for now, here’s the old version.

B&M Lumos B

Making an Old Skool Compact Double

09 Thursday Feb 2012

Posted by Stonehog in Cycling

≈ Leave a comment

Tags

94BCD, bolt circle, bolt circle diameter, chainring, circle diameter, compact double, gear inches, Sheldon Brown, Shimano, shimano xt, Suntour, suntour xc, tread, XC Pro


I like to minimize my front derailleur throw to two chainrings, and with modern cassettes like the Shimano HG61 12-36t, you don’t need a triple anymore unless your are really slogging up 20% grades or running a hundred pound cargo/touring bike.  I don’t find myself in these situations, and my knees are still fairly stable.  As such, I wanted to try a double that was lower than the XD2 crank I was using.  Since it only had one bolt circle diameter (110BCD), this resulted in a minimum chainring of 33t.  Here’s a handy chart from the venerable Sheldon Brown pages.  This was a bit too much for the really steep hills.  I want something that is more “granny” for the Seattle pitches I find myself climbing on the daily commute.

First things first.  I had two older cranks – a Suntour XC Pro 175mm from my old Stumpjumper Pro circa 1992.  This has 94 and 56 Bold Circle Diameter options.  The 56 is fairly hard to find these days (Peter White sells them), and there are really 20-24t rings for this.  That’s a bit too small.  However, with 94 BCD, I can go down to 29t.  This was one option.   I also have an ’88 Shimano XT 175mm Crankset that sports 110/74 BCD.  This would allow a small ring down to 24 on the inside ring.

ye olde cranke

Because I’m partial to the XC Pro (it was my first and favorite mtb), and I would be able to use the outside ring bolts for both rings, I opted for this setup.  My current bottom bracket is a 107mm SKB, and it results in a fairly narrow tread.  By putting my rings on the outer bolt, it results in a better chain line for this setup.

The new old compact double

As you can see, I’ve left the inner ring empty:

Empty Inner

In using a 32t chainring with my new cassette’s 36t big ring, I have a 24 gear inch setup for the low end.  This goes up to 103.5 gear inches for my 46t-12t big chainring small sprocket combo.  That’s as wide as most triples these days, and allows me plenty of gearing for most anything I’m riding.

The close up

Dyno = Good!

08 Tuesday Feb 2011

Posted by Stonehog in Cycling, Uncategorized

≈ 4 Comments

Tags

bicycle, Busch & Muller, Clinometer, commute, CYO, dynamo lighting, dyno, hilsen, homer, IQ, rivendell, Shimano, Toplight


Steel Dyno Commuter

I’ve biked in the dark for years using battery lights.  Over the past few seasons I’ve used various Planet Bike lights, and put up with the  fading light on my hour commute home.  I was contemplating getting a lithium-ion rechargeable that a friend had recommended (Exposure Toro), but a nagging little voice kept bugging me to try a dyno and be free of the battery mess.

I finally picked out a Shimano/Mavic dynamo hub/rim combo from Universal Cycles for a buck 50, and called Peter White for some lights.  I went with the B&M IQ CYO RT

B&M IQ CYO RT Headlight

and Toplight Line Plus.

B&M Toplight Line Plus Taillight

As the wheel came with no instructions, I had to dig them up on the web.  I found the manual in the Shimano docs.

The only tricky part was figuring out which wire was ground (white stripe) and where it goes on the hub connector (the side with the little graphic).  I mounted the light to the fork crown.  Once that was done, I just zip tied the front light wire to my fork, taped the tail light wire under the top tube, zip tied it out the rack and up to the tail light that I mounted on the back of a Wald Large basket.  I used a couple large washers to hold it to the rack wires, and it turned out solid and lined up well.

Wald Washer Mount for Taillight

I left all the extra wire to the tail light and just looped the excess under the rack so I would have it if I ever mounted it on another bike.  I coiled the extra front light wire around the fork by the connector for the same reason.

Extra wire near hub

On my beam alignment first ride, I found that the perfect beam happened when I had the face of the CYO at exactly 90 degrees.  As it’s also a reflector, I figure this is just due to precision engineering.  I also found that my iPhone app, Clinometer, has become one of the most effective tools to have in the bike kit.

Reflections

For what it’s worth, I ride between 12-17 mph on my commute, but there are large sections where I’m doing under 9 mph on hills.  I haven’t over-run the light yet on my 30+ mph downhill blasts, but most of my fast downhill sections are well lit streets.

I’m sold.  I will now be adding this same lighting setup to my A. Homer Hilsen next season.  It’s super great to not have to worry about batteries, and I find myself going to my “rain” bike just so I can ride this light combo home at night.  It’s much better than the 2 watt Planet Bike Blaze (at over twice the price…) I’ve used now for 2 seasons.  That light tends to have a poor definition, and the B&M has such great focus, it truly cuts off at waist level when riding, so it’s not blasting folks on the trail coming towards me.  I get much better close field light, and there is noticable light to either side in front of me. It’s also always the same!  No more of the guessing if the batteries are starting to die.  Just consistently bright light.  Love it!

Flickr Photos

BH-19.jpgBH-18.jpgBH-17.jpgBH-16.jpgBH-15.jpgBH-14.jpgBH-13.jpgBH-12.jpgBH-11.jpgBH-10.jpg
More Photos

Archive

  • August 2020 (1)
  • March 2018 (1)
  • January 2018 (1)
  • July 2017 (1)
  • June 2017 (1)
  • May 2017 (1)
  • February 2017 (1)
  • December 2016 (1)
  • November 2016 (1)
  • August 2016 (2)
  • March 2016 (1)
  • January 2016 (6)
  • December 2015 (2)
  • November 2015 (1)
  • June 2015 (5)
  • May 2015 (1)
  • April 2015 (1)
  • March 2015 (2)
  • January 2015 (2)
  • December 2014 (2)
  • November 2014 (2)
  • October 2014 (2)
  • September 2014 (2)
  • August 2014 (1)
  • July 2014 (1)
  • June 2014 (1)
  • May 2014 (2)
  • April 2014 (5)
  • March 2014 (4)
  • February 2014 (4)
  • January 2014 (6)
  • December 2013 (1)
  • November 2013 (2)
  • October 2013 (2)
  • September 2013 (1)
  • August 2013 (1)
  • July 2013 (2)
  • May 2013 (6)
  • April 2013 (1)
  • March 2013 (6)
  • February 2013 (2)
  • January 2013 (7)
  • December 2012 (5)
  • November 2012 (2)
  • October 2012 (2)
  • September 2012 (3)
  • August 2012 (3)
  • July 2012 (1)
  • June 2012 (4)
  • May 2012 (7)
  • April 2012 (1)
  • March 2012 (1)
  • February 2012 (4)
  • January 2012 (5)
  • December 2011 (6)
  • November 2011 (4)
  • June 2011 (2)
  • May 2011 (4)
  • March 2011 (2)
  • February 2011 (4)

Enter your email address to follow this blog and receive notifications of new posts by email.

Join 95 other subscribers

Blog at WordPress.com.

  • Follow Following
    • Cycle Seattle
    • Join 95 other followers
    • Already have a WordPress.com account? Log in now.
    • Cycle Seattle
    • Customize
    • Follow Following
    • Sign up
    • Log in
    • Report this content
    • View site in Reader
    • Manage subscriptions
    • Collapse this bar
 

Loading Comments...